Publishing Design
23.04.2025
Graciella Limpah / 0364517
Publishing Design / Bachelor of Design (Honours) in Creative Media / Taylors
University
JUMPLINKS
LECTURES
Publishing Design: Formats
Types of Publications
There are various types of publications, including books, newspapers, magazines, and digital publications. However, the primary focus is on books, due to their historical significance and influential role in the publishing industry.
Designing Books
Designing a book demands a deep understanding of typography, spatial awareness, an eye for detail, and proficiency in publishing software like Adobe InDesign. Key design considerations include target audience (e.g., children’s books), content type (e.g., visuals, diagrams), and physical factors (e.g., paper type, binding).
Historical Context of Book Formats
The course examines the evolution of publishing formats across different civilizations:
Different civilizations used locally available materials like clay, papyrus, bamboo, and palm leaves. Parchment, made from animal hide, enabled more durable and portable texts. Paper, originating in China, made its way to Europe via Persia and the Ottoman Empire, becoming widely used by the 1400s–1500s. Wood pulp-based paper became the norm in the 1860s.
Technological Innovations
Publishing evolved alongside technological advancements. Innovations included:
There are various types of publications, including books, newspapers, magazines, and digital publications. However, the primary focus is on books, due to their historical significance and influential role in the publishing industry.
Designing Books
Designing a book demands a deep understanding of typography, spatial awareness, an eye for detail, and proficiency in publishing software like Adobe InDesign. Key design considerations include target audience (e.g., children’s books), content type (e.g., visuals, diagrams), and physical factors (e.g., paper type, binding).
Historical Context of Book Formats
The course examines the evolution of publishing formats across different civilizations:
- Mesopotamia: Writing evolved from a token-based counting system to pictographic clay tablets.
- Ancient Egypt: Hieroglyphics were inscribed on tombs and papyrus; a paper made from the papyrus plant.
- Indus Valley: Early evidence of script and symbols in a trading context.
- China: Early texts were written on threaded bamboo strips, later evolving into woodblock printing of Buddhist, Daoist, and Confucian texts. Movable type originated here and was further developed in Korea.
- Europe/Turkey: Parchment, invented in Turkey, was a key material in early European books. Bound books replaced scrolls as techniques and materials evolved.
Different civilizations used locally available materials like clay, papyrus, bamboo, and palm leaves. Parchment, made from animal hide, enabled more durable and portable texts. Paper, originating in China, made its way to Europe via Persia and the Ottoman Empire, becoming widely used by the 1400s–1500s. Wood pulp-based paper became the norm in the 1860s.
Technological Innovations
Publishing evolved alongside technological advancements. Innovations included:
- The development of bound books from scrolls via sewing techniques.
- The invention of movable type (first in China/Korea), which revolutionized printing in Europe.
- The transition to printed paper as the primary medium for mass communication.
Publishing design : History of Print
The origins of printing trace back to ancient China in the 2nd century AD. In 175 AD, the Chinese emperor commanded that the Confucian classics be engraved in stone. Scholars eager to preserve these texts would press sheets of paper onto the stone and rub them with charcoal or graphite, creating a white-on-black text impression. This technique of stone rubbing was one of the earliest ways written content was reproduced and shared.
Korea and Japan (AD 750–768): Early Mass Printing
By the 8th century, the practice of printing had spread to Korea and Japan. One of the most ambitious projects came from Japan, where in 768 AD, Empress Shōtoku commissioned the production of one million prayer scrolls known as Hyakumantō Darani. These were created using woodblock printing and distributed to Buddhist pilgrims, marking one of the first large-scale printing efforts in human history. Many of these printed scrolls still survive today.
The First Printed Book (AD 868): The Diamond Sutra
A groundbreaking moment in printing came in 868 AD with the production of the Diamond Sutra in China. This scroll, over 16 feet in length, is the earliest known complete printed book. It is particularly notable for featuring the world’s first printed illustration; a depiction of the Buddha surrounded by his followers. The book represents a major step in the use of woodblock printing for both religious and literary purposes.
Chinese Publishing (10th–11th Century): A Golden Age of Printing
In the 10th and 11th centuries, Chinese printing flourished. Entire collections of Confucian classics, along with thousands of Buddhist and Daoist texts, were reproduced using intricate woodblock printing methods. Although the process of carving each character into wooden blocks was labor-intensive, it enabled the widespread distribution of scholarly and religious knowledge throughout China.
Type Foundry in Korea (c. 1380): The Rise of Movable Type
A major innovation came in Korea in the late 14th century, when printers began casting movable type in bronze. This was a significant improvement over earlier Chinese experiments using fragile clay. Although Korea was still using complex Chinese characters at the time, this development laid the groundwork for more flexible and reusable printing systems. In 1443, Korea simplified its writing system with the creation of Hangul, which made movable type even more practical.
Saints and Playing Cards (c. 1400): Printing Arrives in Europe
Printing made its way to Europe around 1400, primarily through the use of woodblocks. The first printed items were religious images sold to pilgrims and early versions of playing cards. Just like in Asia, paper was laid over carved and inked woodblocks and rubbed to transfer the design. These humble beginnings marked the start of Europe’s own printing revolution.
Gutenberg and Western Printing (AD 1439–1457): The Printing Press
The true transformation of printing in the West came with Johannes Gutenberg in the mid-15th century. By 1439, he had developed a press capable of applying even pressure and created durable metal movable type. His most famous work, the Gutenberg Bible, was completed around 1456 and showcased the power of this new technology. Another masterpiece, the Mainz Psalter (1457), introduced impressive color printing with two-tone initials. Gutenberg’s innovations made books more accessible and helped spread knowledge across Europe, sparking the beginning of the information age.
The World’s Largest Book: Kuthodaw Pagoda, Myanmar
An extraordinary symbol of printing's cultural impact is found in Myanmar at the Kuthodaw Pagoda. Built in the 19th century, it houses what is considered the world’s largest book; 729 marble slabs inscribed with Buddhist scriptures. Each slab is protected in its own stupa, arranged around a central golden pagoda. Though created long after the printing press, this monument stands as a testament to the human desire to preserve and share knowledge on a monumental scale.
Publishing Design : Typo Redux
Importance of Typography
- Typography is essential in graphic design, akin to oxygen for living beings.
- Mastery of typography is crucial for effective communication and expression in design.
Key Concepts in Typography
- Typography is essential in graphic design, akin to oxygen for living beings.
- Mastery of typography is crucial for effective communication and expression in design.
Key Concepts in Typography
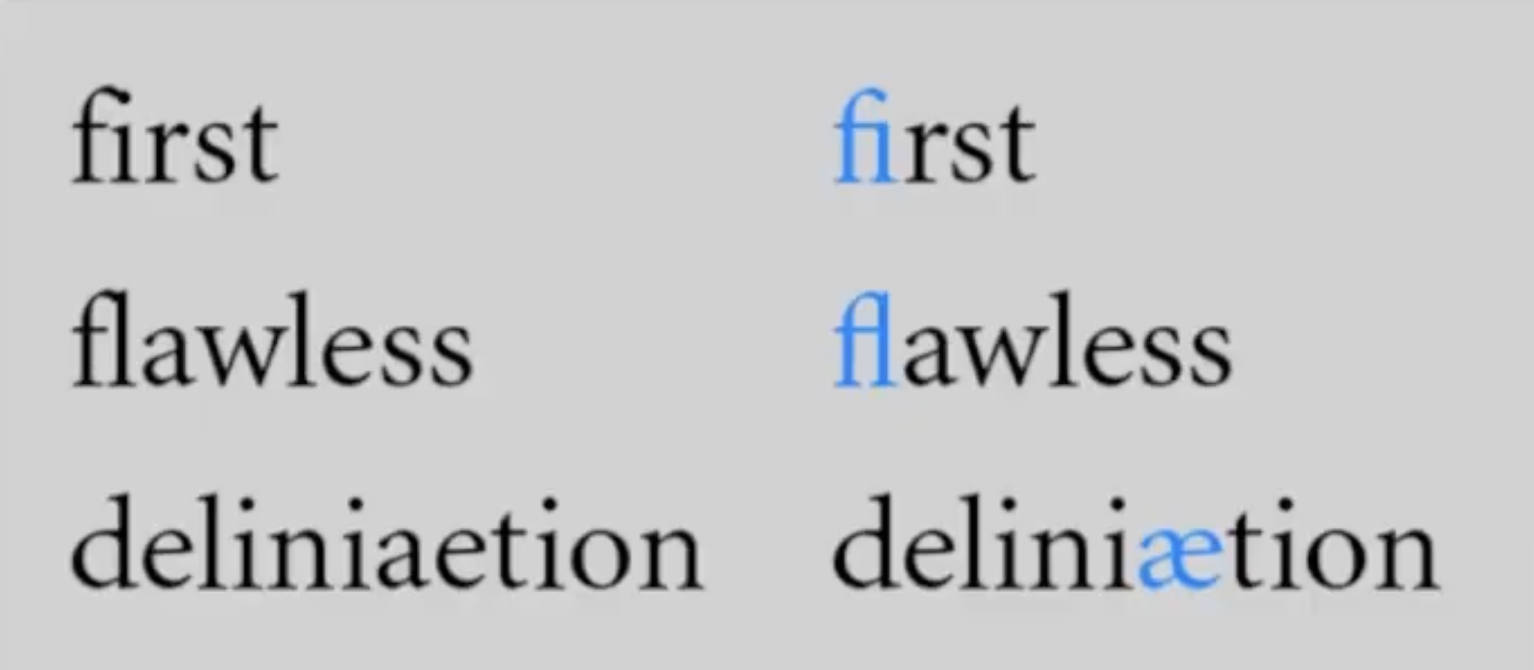
- Typefaces and Glyphs: Each font family contains various typefaces, which may include small capitals, numerals, fractions, ligatures, and punctuation.
- X-height: The height of lowercase letters, which is important for understanding the proportions of typefaces.
Character Types
- Small Capitals: Used for acronyms and designed to match the x-height of lowercase letters.
- Numerals: Aligned figures (uppercase numbers) and old-style figures (lowercase numbers) serve different purposes in design.

|
| fig 1.1 Character Typeface |
|
| fig 1.2 Character Typeface |

|
| fig 1.3 Weight in Typeface |
- Choosing open and classical serif typefaces enhances legibility for large bodies of text.
- Avoid using all capitals for long texts as it disrupts reading rhythm and comprehension.

|
| fig 1.4 Legibility |

|
| fig 1.5 Example of special purpose styles |

|
| fig 1.6 Example of special purpose styles |

|
| fig 1.7 Example of outline and shadow |
- Proper typesetting is crucial for readability; avoid underlining that touches text as it disrupts pattern recognition.
- Use superscripts and subscripts correctly for citations and mathematical expressions.
- Do not distort fonts by squeezing or stretching them, as this alters their design and readability.
- Avoid thick outlines around text, especially in books, as they can hinder legibility.
- Legibility and Readability: Proper text flow is essential for legibility and readability. Issues arise when type size, line length, and line spacing are not harmoniously balanced.
- Line Length: The ideal line length for readability is about 50 characters, with a maximum of 65 characters 14. Exceeding this can impair reading comfort.
- Type Size and Leading: Type sizes typically range from 8 to 12 points. Leading (line spacing) should generally be 2.5 to 3 points larger than the type size. For example, if the type size is 9 points, the leading should be between 1.5 to 12 points.
- Impact of Small Type: Small type can lead to crammed letters per line, making text hard to read. Proper margins and spacing are crucial to avoid overwhelming the reader.
- Line Spacing: Line spacing, or leading, is the space between lines of text. It should be adjusted based on the font used; for example, Helvetica may require more leading due to its open typeface.
- Widows and Orphans: A widow is a single word at the end of a paragraph, while an orphan is a single word at the beginning of a new column. Both should be avoided as they disrupt the flow of text.
- Kerning and Tracking: Adjusting the space between characters (kerning) and overall letter spacing (tracking) is important for readability, especially in headlines. Proper spacing can prevent visual clutter.
- Alignment: Text can be aligned left, right, center, or justified. Left alignment is preferred for large amounts of text, as it provides a smooth ragged edge on the right.
- Paragraph Spacing: Instead of using double spacing, paragraph spacing should be set to match the leading for a cleaner look. This can be adjusted in design software like InDesign.
- Indentation: Indentation should generally match the point size of the text. For example, if the text is 10 points, the indentation should also be 10 points.
- Hyphens and Dashes: Hyphens are used to divide words, while en dashes and em dashes serve different grammatical purposes. Understanding their correct usage is essential for clear writing.
- Drop Caps: Drop caps should not exceed three lines and should be used sparingly to maintain a modern aesthetic.
- Style Manuals: For complex typography and publishing design, referencing style manuals like the Chicago Manual of Style can provide guidance on formatting and text presentation.
Publishing Design: The Grid
Grids are a key tool in design that help organize content on a page, making
layouts clearer and easier to read. They provide structure while still
allowing room for creativity. Using grids shows a designer’s mindset about
order and planning.Important designers like El Lissitzky and Moholy-Nagy supported the idea of structured layouts using grids. Sharing design work and ideas, such as through platforms like "Clear Bits," helps designers grow and learn.
A grid includes parts like margins (space around the page), text fields (where content goes), gutters (space between columns), and hang lines (guides for aligning text). These elements help make the design clean and readable.
Overall, grids make designs more understandable and visually appealing. They help designers balance creativity with clear communication.

|
| fig 1.8 Grids |
Publishing Design: Elements
This lecture focuses on the elements of publishing design, specifically for
books. The core elements are: textual, visual, and color. Visual elements
include graphical and pictorial elements, and even color can be considered a
visual element depending on its usage. Format (binding, size, paper type) is
also an element, but not necessarily a primary one.The lecture emphasizes achieving a balance between variation and consistency in layout design. Too much variation leads to monotony, while too much consistency makes the book predictable. This balance is achieved through the creative use of the three core elements within a grid system.
Several layout formulas are presented as examples of achieving this balance. These include :
- Text and visual elements of equal proportions on opposite sides of the page.
- A large picture with a caption or pull quote on one page.
- Two columns of text side-by-side.
- A visual covering one side of the page, with text on the other.

|
| fig 1.9 Variation with consistency |
go up
Exercise 4 - Determining Grids


I want to make my book cover meaningful and minimalist.
I let Ms.Vit see the cover, and she gives feedback that the synopsis is too long for each line, so I change it smaller. Also the layout of it. Here is the finished result:
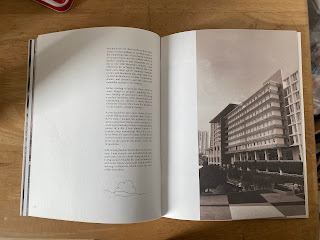
I also change the full photo in page 28 because it seems a little bit
blur.
Poster Draft :
Ms.Vit suggests me not to put the release text italic and she help me to align the title and my name to the element above. Here is the result :
Book Presentation
Week 12 :
Book submitted, Doing Poster
Week 11 :
Book printed
Week 10 :
The layout looks okay, the cover also looks okay, I need to
change the content page.
Week 9 :
Learn how to make cover page, the layout of the book overall is okay,
I need to adjust one of the line.
Week 8 :
Independent Learning Week
Week 7 :
Put some element in the layout, so it didn't look so plain.
Week 6 :
Visual need to be 300 dpi, need to add bleed so the picture on the layout didn't get cut
Week 5 :
Complete movement exercise, find out where to put the visuals for the story
Week 4 :
Complete the exercise, continue determining grids
Week 3 :
Doing Van De Graff exercise.
Week 2 :
Continue on doing the exercises, feedback on the content
Week 1 :
Briefing about the module, start to do exercises and watch lecture from the youtube playlist given. Start on the story draft
This publishing class has been an incredibly valuable learning experience.
Before taking this module, I had no idea how to design a book layout,
create a proper book structure, or even understand the basics—like how a
grid works in book design. Over the course of 14 weeks, I’ve gained so
much knowledge, especially about the detailed process that goes into
making a book.
Each week introduced something new, and I quickly realized that creating a book is far more complex than I initially thought. It’s not just about placing content; you have to consider the flow, layout, color choices, and even details like resizing photographs before including them.
One of the most impactful parts of this journey was receiving feedback from Ms. Vit, our lecturer. Her guidance helped me grow from someone who knew nothing about book design into someone who could complete an entire book by the end of the module.
Overall, this class was not only fun but also deeply rewarding. It gave me practical skills and confidence I didn’t have before.
INSTRUCTIONS
EXERCISES
Exercise 1 - Mock Up Book Size
In this exercise, we have to determine what size we want for our book.
First, we have to draw A5 size in A4 paper, than the size of the book need
to be bigger than A5 and smaller than A4.
I choose the size 188 x 242 mm.

|
| fig 2.1 Mockup book |

|
| fig 2.2 Mockup book (cut) |
Exercise 2 - Signatures
In this exercise, we have to fold A4 paper into smaller size and write
down the pages to know how book pages works.

|
| fig 2.3 Signatures |

|
| fig 2.4 Signatures |

|
| fig 2.5 Signatures |
Exercise 3 - Van De Graff
In this exercise, we have to do both manual and digital Van De Graff
structure.

|
| fig 2.6 Manual Van De Graff structure |
fig 2.7 Digital Van De Graff structure
fig 2.8 Digital Van De Graff structure (no grid)
fig 2.9 Choosing Grids
This is the grid I will use for my book :

|
| fig 2.10 Final Grids |
Exercise 5 - Form and Movement

|
| fig 2.11 Process |

|
| fig 2.12 1 color movement |

|
| fig 2.13 2 color movement |

|
| fig 2.14 Color + Picture movement |

|
| fig 2.15 Color + Picture + Text movement |
fig 2.16 Movement Exercise (pdf)
BOOK
Content Generation
After coming out with a draft, I let Ms.Vit to read the text and she
gave me some feedback.

fig 3.1 Feedback from Ms.Vit
Here is my finished text with highlighted text for my visualization. I'm
going to use photography for this task. Here is my finished text:
fig 3.2 Finished text
Next, I gather all of my photograph for this task. Here is the
photograph:
fig 3.3 Photograph collected
To make sure every visual have the same tone, I add filters to each one
of them, I wanna make it look more dreamy-vintage vibe so it suits more
to my story. Here is the finished visual with filter:
fig 3.4 Adding filter to the photograph
After consulting with Ms.Vit, she suggests that all of the image need to
be 300 dpi, so I move all of the image to photoshop and choose another
filter from the photoshop. Here is the final visual I'm going to use
:
fig 3.5 Final Photograph (300 dpi)
Continuing to do the layout of the book, here is the first draft of the
layout :
fig 4.1 Layout Draft 1
After consulting with Ms.Vit, she said that the first row have a
connection one and another page but after that, there is no more
connection. She asked me to play around with the size of the visual, also
adding some small line graphics to make the design elavated.

|
| fig 4.2 Adding elements |
Here is the result :
fig 4.3 Layout book draft 2
Continuing on doing the cover page of the book. Here are some references
that I wanted to make:

|
| fig 4.4 Book Cover References |
I want to make my book cover meaningful and minimalist.
Here are the cover that I made:

|
| fig 4.5 Book Cover 1 draft |

|
|
|
After doing the front cover, I move to the back cover. Here is how it looks
like:

|
|
|
Then, I put all of it into a context sheet to have feedback from Ms.Vit.
fig 4.8 Book Draft 3
After receiving feedback from Ms.Vit, she told me which part is odd from
the book. I also need to change the book cover. Here is the book cover and
back cover that I made:

|
| fig 5.1 Book Cover Draft 4 |
I let Ms.Vit see the cover, and she gives feedback that the synopsis is too long for each line, so I change it smaller. Also the layout of it. Here is the finished result:

|
| fig 5.2 Book Cover Draft 5 |
After that, I print into context sheet and let Ms.Vit see and she gave me
feedback.
fig 5.3 Book Draft 4
I got feedback that I need to change the color of the front cover to be
the same of the back cover, and the layout overall is okay
already.

|
| fig 6.1 Feedback |

|
| fig 6.2 Feedback |

|
| fig 6.3 Before changing |

|
| fig 6.4 After Changing |
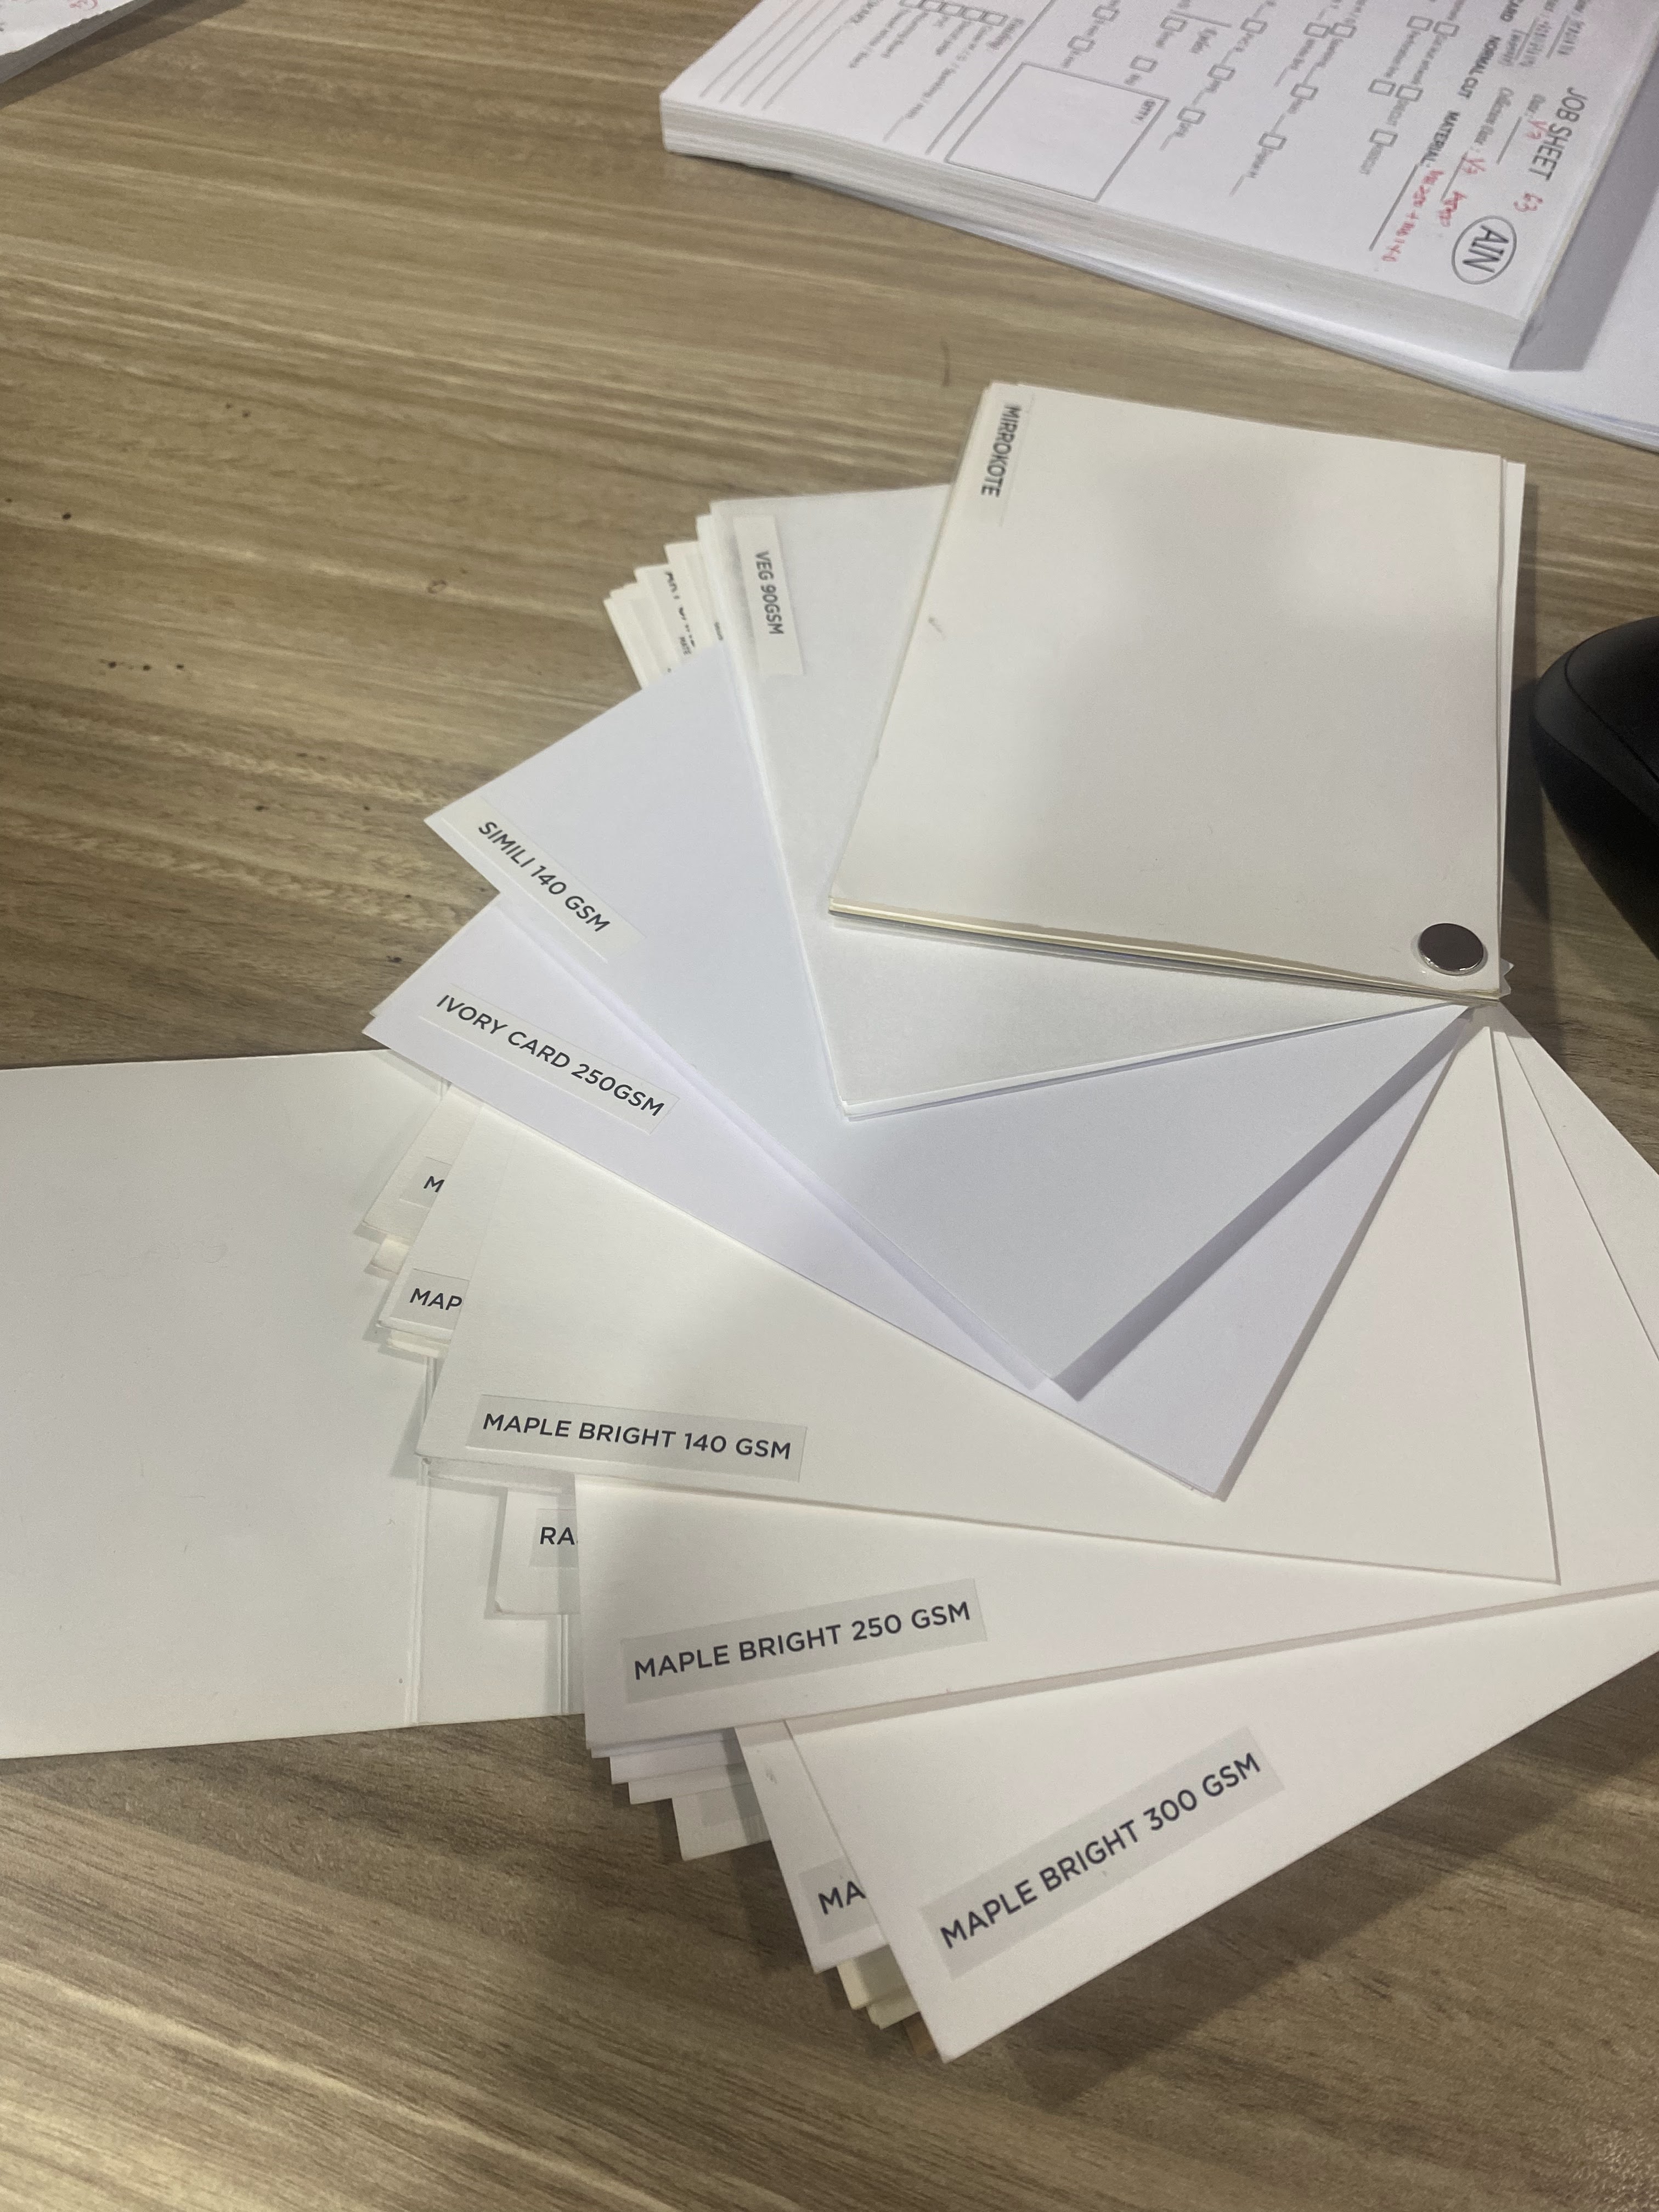
Choosing Material
|
| fig 6.5 Choosing Material |
Material Chosen : Maple Bright 140 gsm for inside, and Maple Bright 250
gsm for cover
Poster Design
References :

|
| fig 6.6 References |
Process :

|
| fig 6.7 Process |
Poster Draft :

|
| fig 6.8 Draft Poster |
Ms.Vit suggests me not to put the release text italic and she help me to align the title and my name to the element above. Here is the result :

|
| fig 6.9 Final Poster |
go up


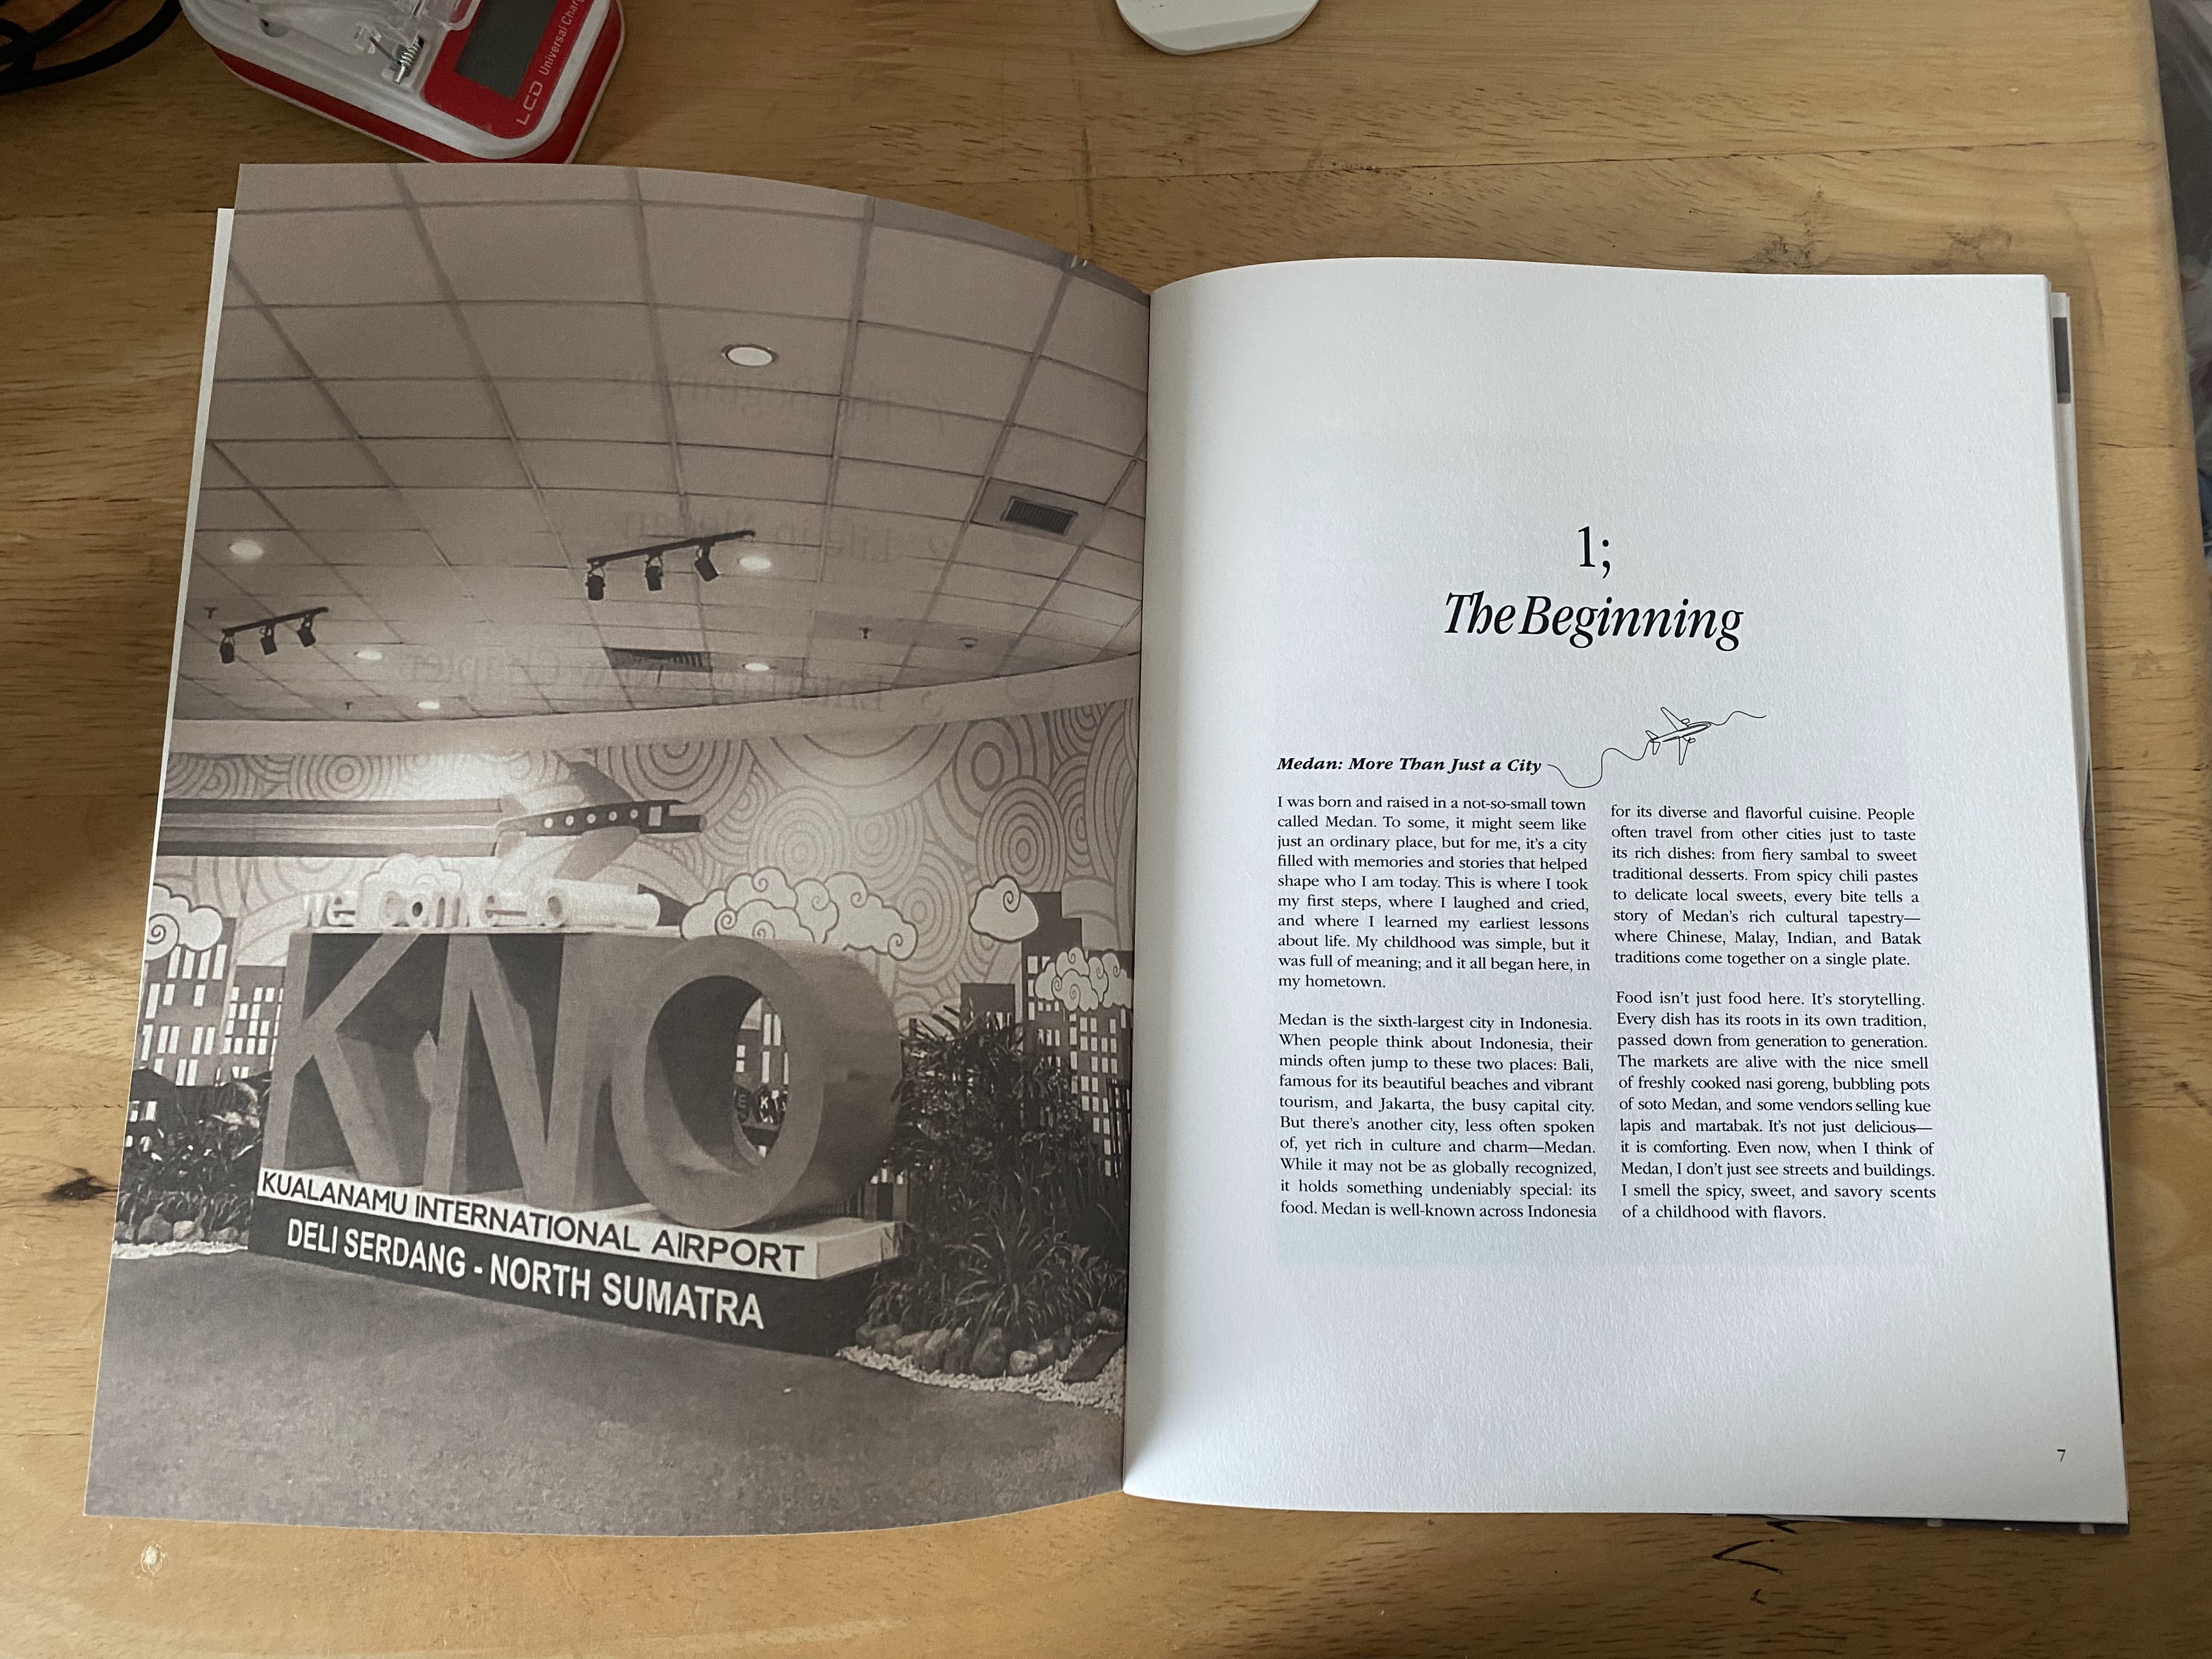
FINAL LAYOUT
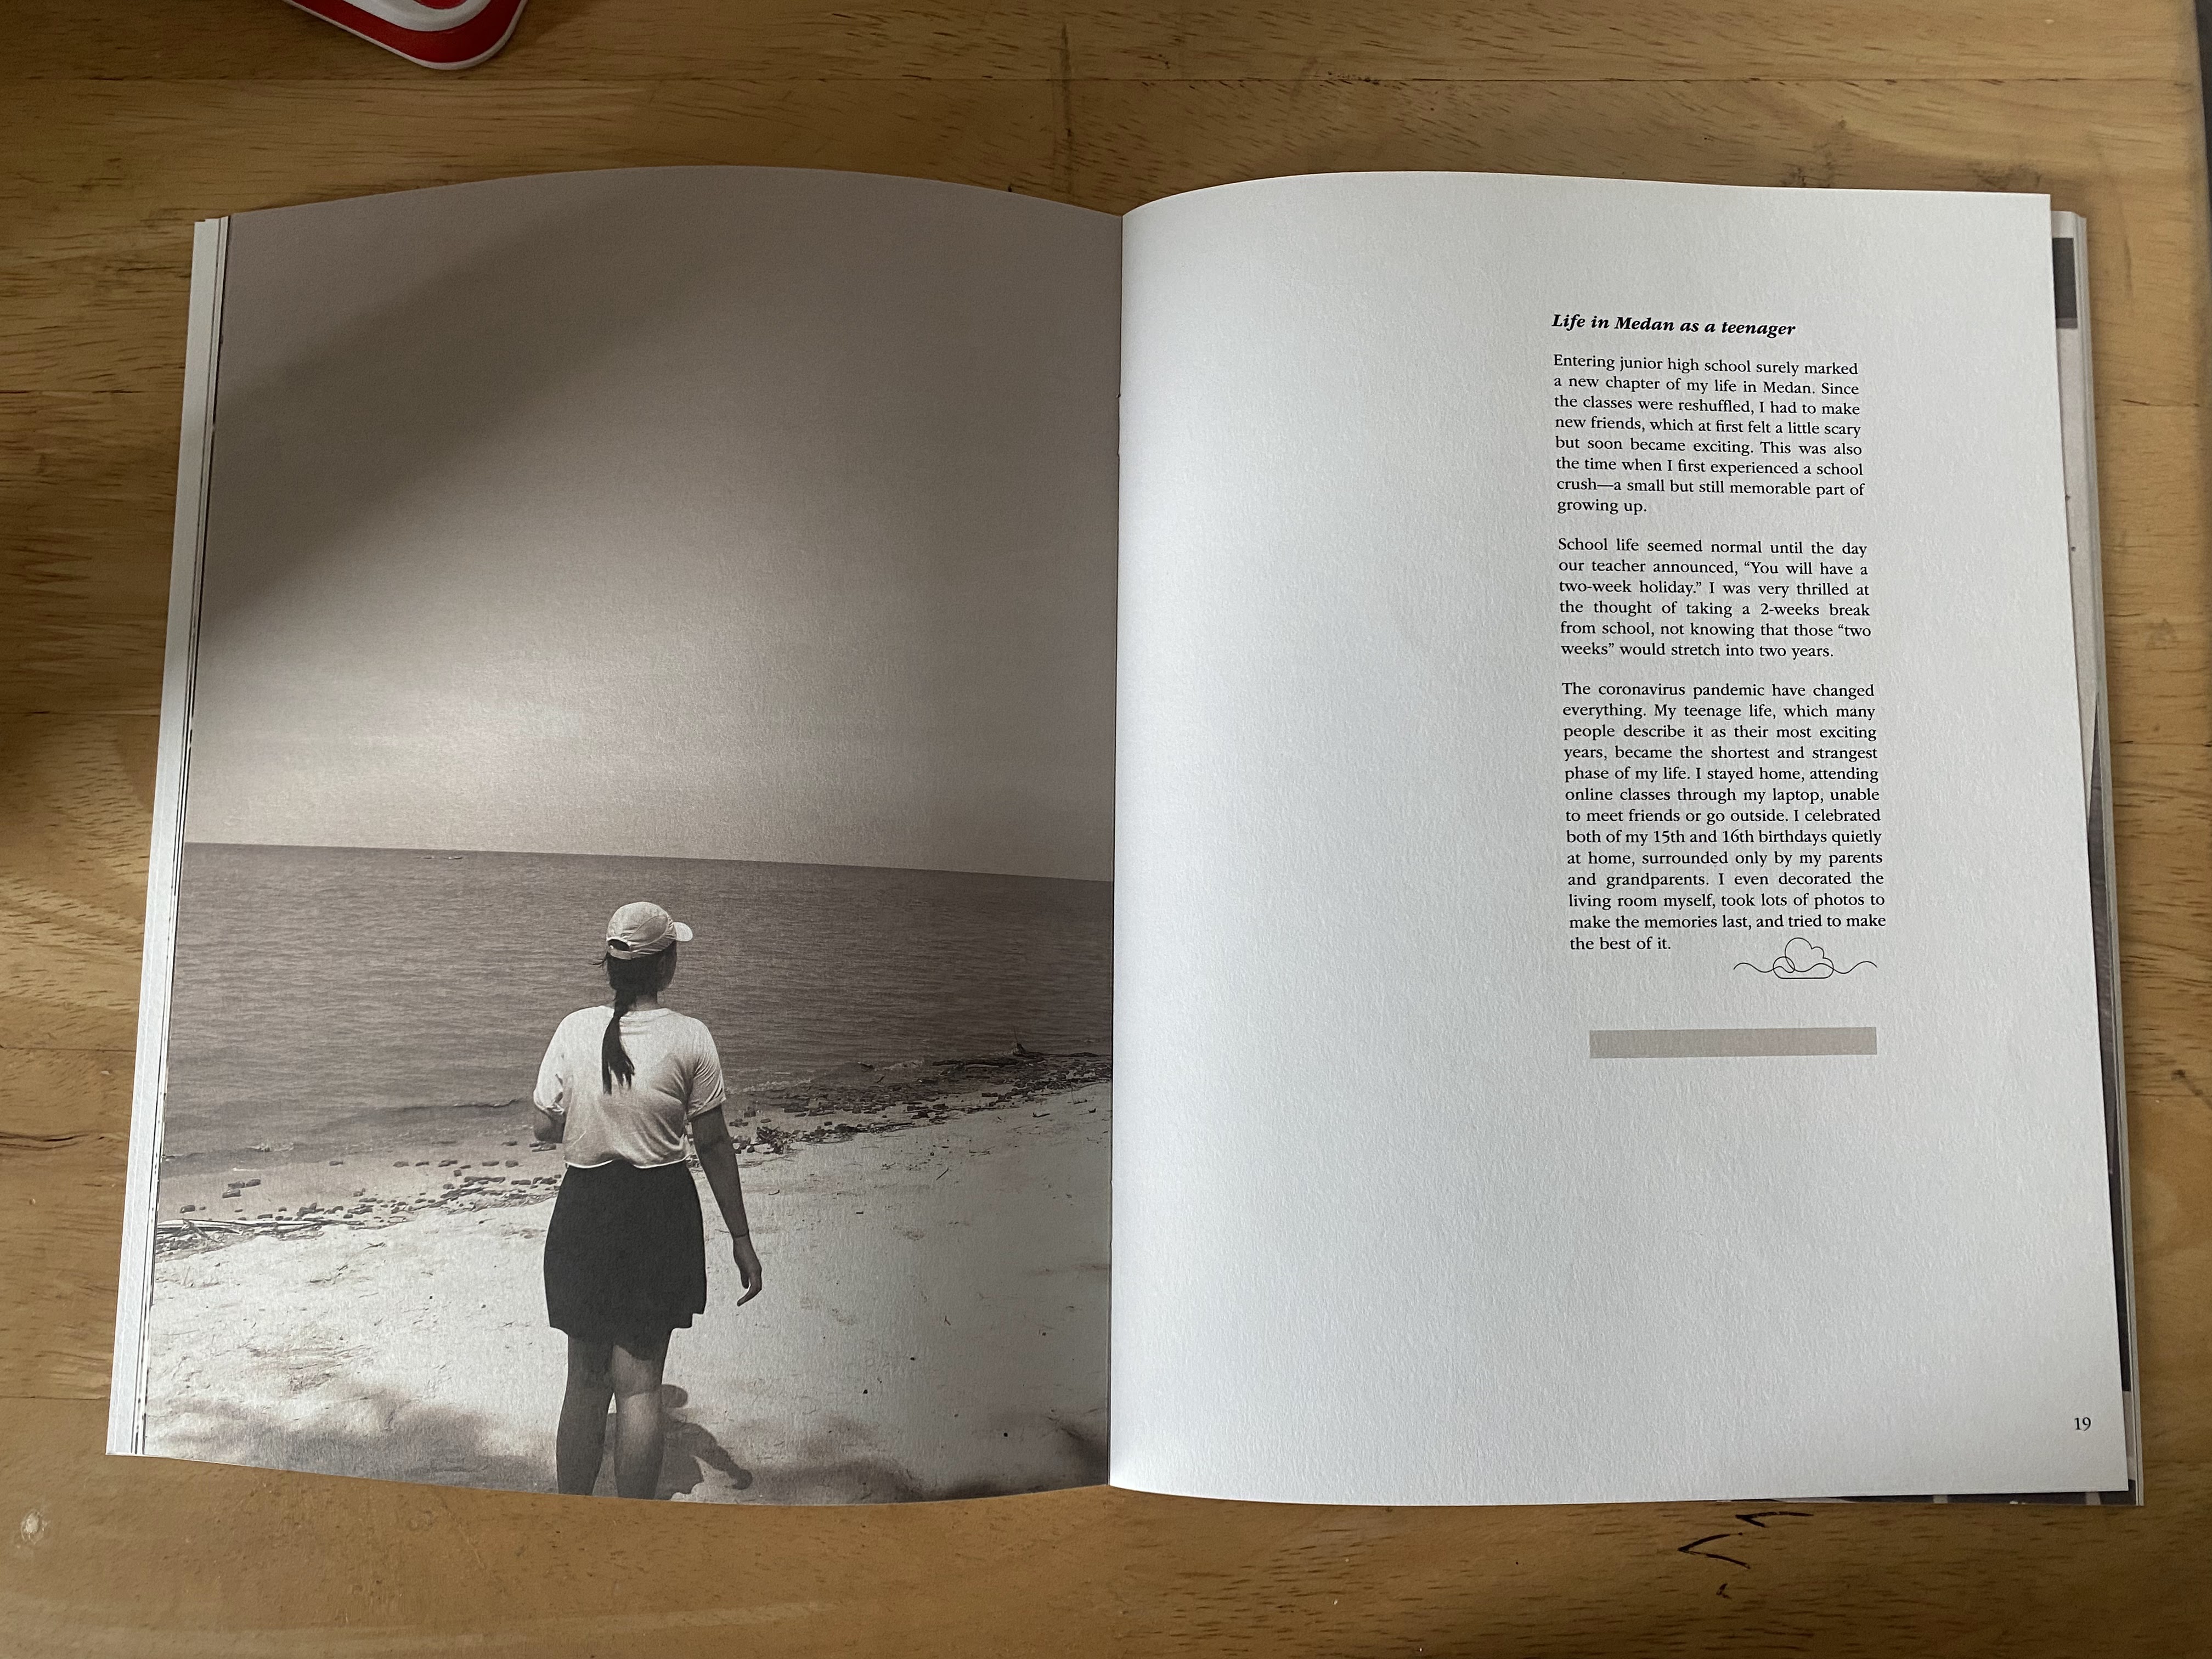
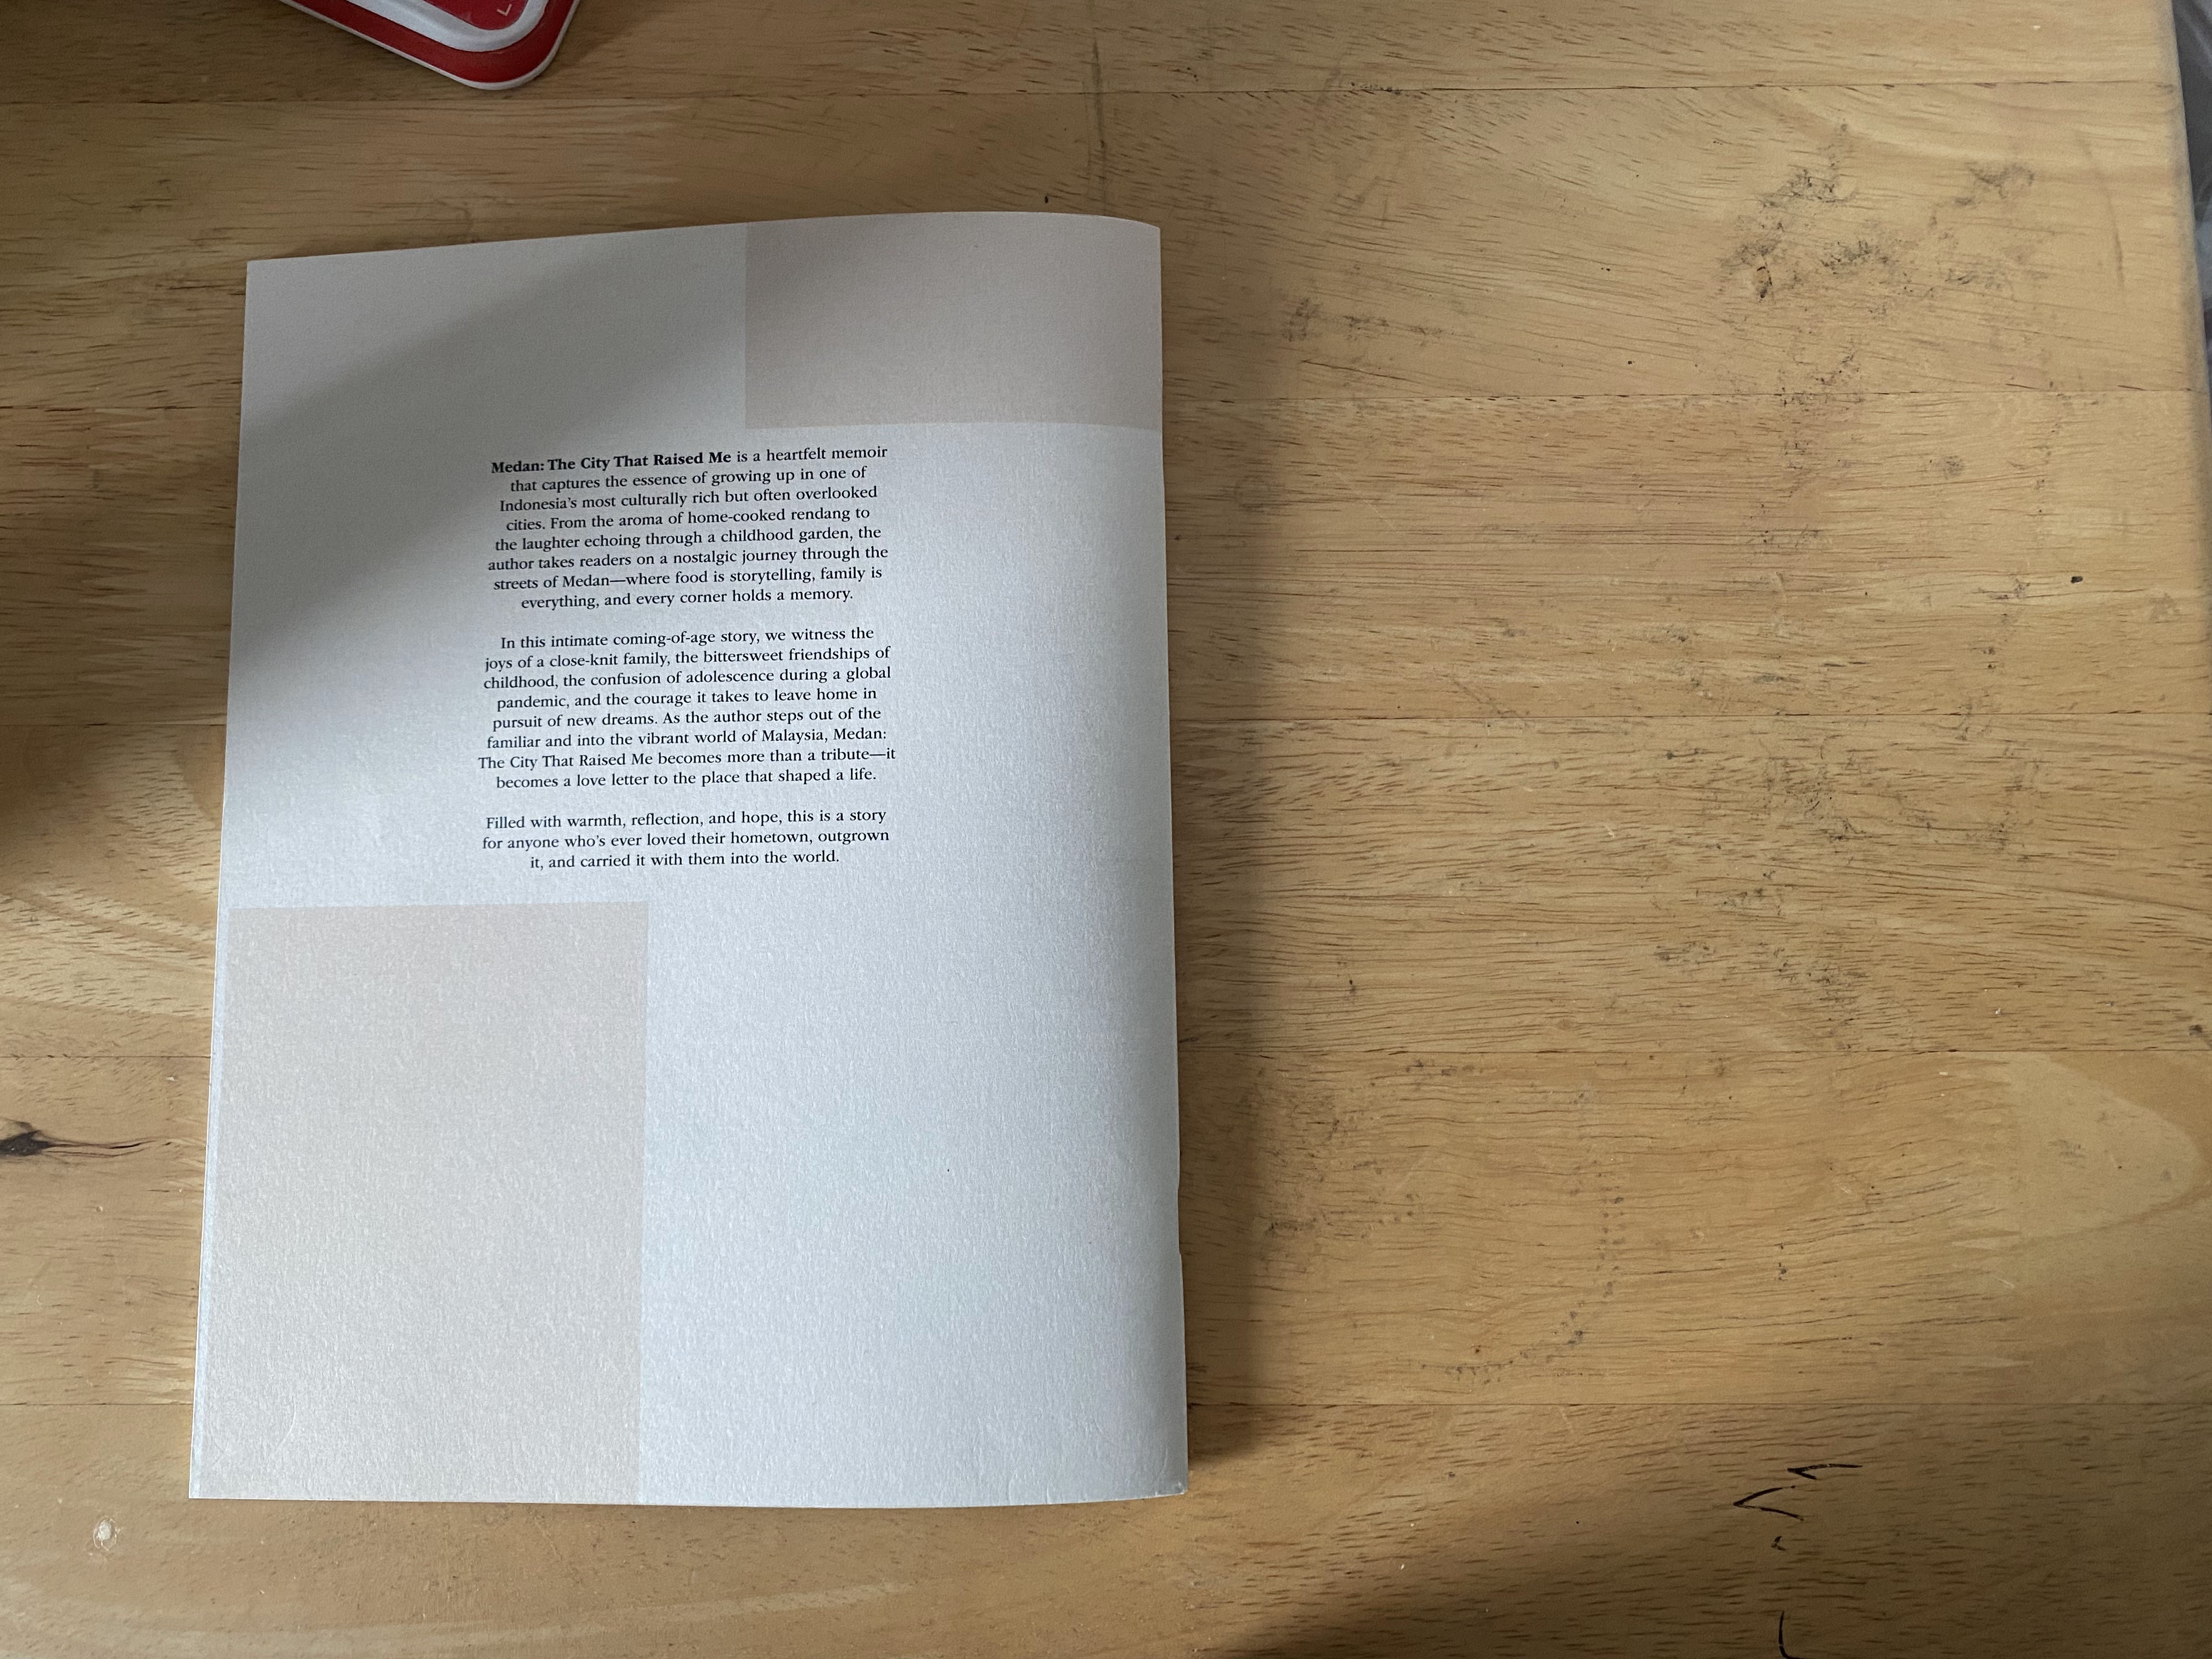
fig 7.1 Compiled Version
fig 7.2 Spread Version
fig 7.3 Pages Version
Online Published Link :
Here
Material Chosen : Maple Bright 140 gsm for inside, and Maple Bright 250
gsm for cover
Printed Book


Video of the Book
Poster Design

Book Presentation

FEEDBACK
Week 13 :Book Presentation
Week 12 :
Book submitted, Doing Poster
Book printed
Week 10 :
The layout looks okay, the cover also looks okay, I need to
change the content page.
Week 9 :
Learn how to make cover page, the layout of the book overall is okay,
I need to adjust one of the line.
Week 8 :
Independent Learning Week
Week 7 :
Put some element in the layout, so it didn't look so plain.
Visual need to be 300 dpi, need to add bleed so the picture on the layout didn't get cut
Complete movement exercise, find out where to put the visuals for the story
Week 4 :
Complete the exercise, continue determining grids
Week 3 :
Doing Van De Graff exercise.
Week 2 :
Continue on doing the exercises, feedback on the content
Week 1 :
Briefing about the module, start to do exercises and watch lecture from the youtube playlist given. Start on the story draft
REFLECTION
Each week introduced something new, and I quickly realized that creating a book is far more complex than I initially thought. It’s not just about placing content; you have to consider the flow, layout, color choices, and even details like resizing photographs before including them.
One of the most impactful parts of this journey was receiving feedback from Ms. Vit, our lecturer. Her guidance helped me grow from someone who knew nothing about book design into someone who could complete an entire book by the end of the module.
Overall, this class was not only fun but also deeply rewarding. It gave me practical skills and confidence I didn’t have before.


Comments
Post a Comment